7 Best Screen Recorders for Windows 7 (Free)

Try Movavi Screen Recorder!

  • Start recording in a couple of clicks

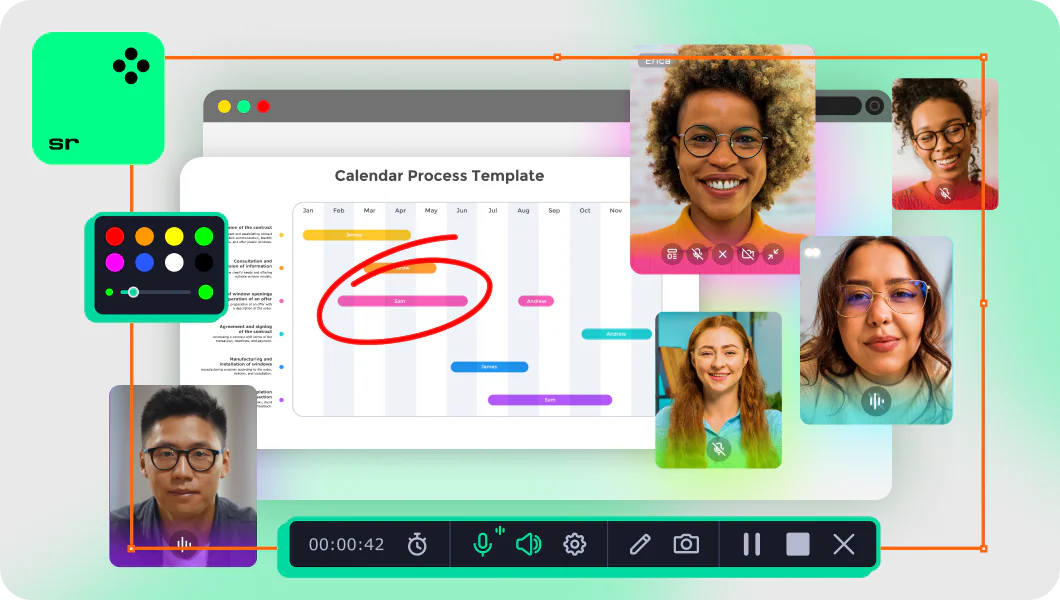
  • Record webcam and screen simultaneously or separately

  • Save your recordings in high quality

Edited by Ben Jacklin
29 064

Want to record your computer screen on Windows 7?  You have several user-friendly options to choose from that offer exceptional quality and ease of use. Read on to learn about some of the best screen recorders for Windows 7.

Quick summary

Best for recording gameplay: OBS

Simple online screen recorder: Screencapture.com

The 1-click Movavi Screen Recorder is our special pick for Windows 7 screen recorder. It's the perfect tool for capturing webinars, online calls, and recording video tutorials. This simple yet powerful program grabs any online event, audio, or streaming video you aim it at.

Movavi Screen Recorder has free trial versions for Windows PCs and Mac computers. Both versions include an impressive set of editing tools that even the raw novice can grasp. You can also choose recording parameters, then hit the REC button and let the magic happen. For a quick start, you can use shortcut keys. Movavi Screen Recorder lets you save the captures to your device in all the convenient file formats. The app is compatible with 32-bit and 64-bit Windows systems.  

At Movavi, we’re committed to providing you with verified information only. Here’s what we do to ensure this:

  • When selecting products to include in our reviews, we research both demand and popularity.

  • All products mentioned in this article have been tested by Movavi Content Team.

  • When testing, we aim to highlight the best features of a product and what it’s best suited for.

  • We study user reviews from popular review platforms and make use of this information when writing our product reviews.

  • We collect feedback from our users and analyze their opinions of Movavi software as well as products from other companies.

How to record your screen with desktop Windows 7 screen recorders

Desktop recorders are software programs that you download to your computer and run natively as you would any other application. These tools for screen recording on Windows 7 tend to be fast and reliable because they are not limited to a network connection. However, they do not work well in situations where you cannot install software on the computer, such as a work computer or other machine that doesn't belong to you.

Movavi Screen Recorder

  • Best for:

    novice and expert users, advanced editing, record live streams

  • G2 rating:

    4.5 out of 5, 45 reviews

Movavi Screen Recorder is one part of a more extensive set of video tools made by Movavi. Like all of its sibling products, Screen Recorder was designed to be easy to use and very powerful. It has advanced features, like recording the screen and audio to separate tracks and scheduling your recording to begin and end automatically. Movavi Screen Recorder fits nicely into a complete video production environment because it integrates nicely with and shares many interface elements with the other video products that make up Movavi Video Suite.

Pros:

  • Capture button clicks and cursor movement for easy-to-understand guides and explainers

  • Save everything from your screen in high resolution

  • Draw on your video while recording and add shapes, lines, and arrows

  • Create noise-free soundtracks – record system sound and mic audio

  • Enjoy seamless work on Windows 7 computers

Cons:

  • Unlock all the functionality with a subscription

Here’s how to record your screen on Windows 7 using Movavi Screen Recorder:

  1. Download the software and run the installation file. Instructions will appear telling you how to install the program. After the installation is complete, the program will open automatically. 
  2. Adjust the capture area to cover the part of the monitor you want to record. To do that, hit the Screen recording icon on the sidebar and select the area you will be recording.
  3. Click the REC button to start recording your computer screen. When you are done recording, click Stop. In the window that pops up when you stop recording, you'll be able to perform basic editing tasks on the recorded video, such as trimming segments out of the final product. You can then export the file to disk.

Windows 7's built-in Game Bar

  • Best for:

    capturing videos of PC games

You may have heard friends or acquaintances talk about recording their screen with the Game Bar – a built-in Windows video recorder software. If you've tried to find it on Windows 7, you may be under the impression that it's hidden somewhere impossible to find. Unfortunately, this recording tool is not available for Windows 7. It was initially a part of the Xbox app designed specifically for Microsoft Windows 10, as more recent Xbox models also use that operating system. It is useful for game recording and is designed to be Xbox compatible. It includes every app available from the Windows Marketplace and some that aren't.

If your computer meets the specifications and requirements for Windows 10, you can upgrade and get access to the Windows 10 Game Bar. If you don't want to upgrade to Windows 10, Movavi Screen Recorder makes an excellent alternative that is nearly as quick to use as the native Windows 10 solution and gives greater control over the output.

Pros:

  • Free tool, built into Windows

  • Records videos of gaming sessions

  • Live-streams (no third-party software needed)

  • Share content from Windows and Xbox games

Cons:

  • Not all games work while using Game Mode

  • Games compatible with Game Mode may not run in full screen

Here’s how to record a video on PC with Game Bar:

  1. Press the Windows + G key combination to bring up the Windows 10 Game Bar.

  2. Press the record button on the overlay that pops up. Windows will then record the video until you tell it to stop and save the results in the folder that you set in the program's settings menus.

Download Game Bar

OBS Studio

  • Best for:

    screencasts and broadcasting game streams to platforms like YouTube and Twitch

  • TechRadar rating:

    4 out of 5

OBS is a free screen recorder for PCs on Windows 7. It’s a compelling solution for broadcasting streaming video, with many great features for mixing and combining sources to create a very professional look. This power comes at a cost, though. The software was designed for hardcore streamers who need strict control over every second of their stream. For a simple push-and-record scenario, it isn't effortless to use and not as intuitive as other solutions on the market. The software is free and worth a try if you don't mind a bit of a learning curve and look for something with a lot of flexibility.

Recording with OBS is more complicated than recording with most video-recording software. After you've downloaded this free screen recorder for Windows 7, you'll need to do some setup that other programs don't require.

Pros:

  • Powerful high-quality video recording tool

  • Computer screen recording

  • Open-source code

  • Easily connects with popular streaming service providers

  • Plugins available to add custom functionality

Cons:

  • Layout a tad overwhelming for novice users

  • Can be taxing on CPU usage

Here’s how to screen-record on a laptop with the Windows 7 system using OBS:

  1. Before you can record, you have to create a scene. To do so, click the + icon in the section of the OBS window marked Scenes

  2. Give the scene a name and then move over to the section marked Sources. Click the + icon there to add a source. 

  3. Select Display Capture to capture your display. Now, you can press the Alt key and drag the mouse to crop the capture area. 

  4. Once everything is ready, press the Start Recording button to begin the capture process.

Download OBS Studio

iTop Screen Recorder

  • Best for:

    record webinars, online meetings/classes, streaming videos/audios, gameplays and create video tutorials

iTop Screen Recorder is a screen recorder for Windows 7 with a free download. This comprehensive screen capture and video editing tool is designed to record and edit any important or memorable moment on your screen. It offers an easy and free way to record webinars/meetings, presentations, games, online shows/movies as well as live streams. Additionally, this screen recorder allows you to capture HD videos in 1080p, 4K, 60fps with no shutters thanks to hardware acceleration. With its convenient editing tools, you can efficiently enhance their recordings with music, animations, transitions, captions, effects, and filters. Serving as a solid recording program, it is fully compatible with Windows 11, 10, 8 and 7.

Pros:

  • Record any part of the screen with audio and webcam

  • Capture audio only without background noise

  • Capture webcam only with virtual background

  • Record gameplay without FPS drops

  • Screen record with no lagging and no time limit

  • Create videos with the built-in advanced editor

Cons:

  • It is only available for Windows.

  • Watermark for free version.

Here’s how to record a video of your screen using iTop Screen Recorder:

  1. Set up preference. Record full screen or any selected area and adjust other settings as you want.

  2. Record the screen. Record what is happening on your screen without lagging on the frame.

  3. Save and edit. Output the video to any popular format and simply edit your video.

Download iTop Screen Recorder

How to record your screen on Windows 7 with online recorders

Simple online screen recorder

Screencapture.com

Editor’s rating:

4
/5
Editor’s choice

Desktop recorder with editing capabilities

Movavi Screen Recorder

Editor’s rating:

5
/5

Best for recording gameplay

OBS

Editor’s rating:

4.5
/5

If you’re wondering how to screen record on Windows 7 without any software downloads, try online recorders. With these tools, you can record videos on a PC using nothing but a browser and an internet connection. Of course, the downside is that any internet connectivity problems will prevent you from using the software.

Screencapture.com

  • Best for:

    teachers, students studying at home, presentations, creating tutorials

  • Trustpilot rating:

    4.6 out of 5, 190 reviews

The need for a download puts many people off of using Apowersoft. Screencapture.com is a new service that is still growing, but it already has an advantage over Apowersoft in that it doesn't require any downloads to work. There is a free version of the tool that will place a small watermark on the recorded video. The web-based tool functions are a webcam recorder and a screen recorder with audio capture. Users will likely find the site easy to use and convenient.

Pros:

  • No need to download/install an app to use

  • Fast HD video saves

  • Records audio, voice, and internal system sounds

  • Can include user's face via webcam

Cons:

  • Cannot upload files directly to video-sharing sites like YouTube

Here’s how to record a video on Windows 7 with Screencapture.com: 

  1. Go to the website.

  2. Select your options. A dialog will pop up asking for permission to access the required functionality to record the screen from your browser. You can choose to record your entire screen, a specific open window, or an open tab in the browser you are visiting the site from.

  3. Press Start Recording.

Apowersoft Online Recorder

Apowersoft is a website that allows for screen video capture on Windows 7 straight from a browser. The website does require that you download a small helper application that will enable it to better communicate with your computer. But the actual recording process will be started from the website. This little download gives it some of the features that its fully native counterparts have, such as selecting which parts of the screen to record. When you are done recording, the software lets you save the file to disk or upload it to popular video and cloud storage services. The tool is suitable for capturing webinars, recording desktop activity, saving online calls, etc.

Pros:

  • Easy to use, flexible one-click screen recording

  • Wide range of useful features

  • No limits on what you can record or for how long

  • Export recorded videos to multiple formats

  • Make annotation while recording

Cons:

  • Needs an internet connection to work

  • Must download/install the app, despite being an online recorder

After you've downloaded and installed the helper application, recording with Apowersoft's free screen recorder for Windows 7 is easy: 

  1. Browse to the website and press the Start Recording button in the middle of the screen.

  2. The application will open up, and you can choose between a screenshot and video capture. 

  3. After choosing video capture, you'll hit the Record button to start recording and the Stop button to finish. 

  4. To save the file, click the share icon in the bottom right corner of the window and choose to save it to a file rather than upload it to a cloud service.

Apowersoft Online Recorder

How to use Google Chrome extensions for screen recording on Windows 7

The Google Chrome extensions below are like a cross between the previous two options. You'll be using your Chrome web browser as the host for a screen recording program, but the two extensions listed work when the machine is offline. So you have the benefit of a locally installed screen recorder and the convenience of not having to open an extra app to use it.

Movavi Screen Recorder for Chrome

  • Best for:

    Chrome users who need to capture browser tabs, screens, or windows

  • Google Web Store rating:

    5 out of 5 stars, 7 reviews

  • Users:

    616

Movavi's Screen Recorder is available as a super-convenient, secure Chrome app. It's a fast, easy-to-use screen and audio-recording tool that grabs any tab or desktop screen. It even lets you do voiceovers with a mic, which is great for recording video tutorials. You can also record sounds and embed your webcam image into video captures.

Movavi Screen Recorder for Chrome has an intuitive, uncluttered interface. Its simple settings ensure anyone can grasp this extension seconds after installing it. There are no restrictions on recording times, numbers of recordings, or file downloads.

Recording screens with Movavi Screen Recorder for Chrome could not be easier. All you do is add, then pin the extension to the browser's top-right corner. Your app is now accessible wherever you go. Set your preferences and choose to capture the active tab or your entire screen. That's it! You can now download and enjoy your captured files.

Download Movavi Screen Recorder for Chrome

Pros:

  • Super easy-to-use, intuitive interface

  • Records Chrome tabs or the entire screen

  • Records audio

Cons:

  • Free version includes a watermark

Screencastify

  • Best for:

    quickly create troubleshooting and how-to videos, record product demos, etc.

  • Google Web Store rating:

    4 out of 5 stars, 11,646 reviews

  • Users:

    10 000 000+

For a browser-based screen capture tool, Screencastify comes with a pretty hefty feature set. You can record your desktop or browser tab in full HD and get audio from your microphone to add narration to the video. You can also use the extension as a webcam recorder. Videos can be saved locally but are also automatically saved to Google Drive. Essential editing tools allow you to trim the start and end of your videos and draw on the video with a pen tool. In the paid full version, it can merge, crop, and add text to the video that you've captured.

Pros:

  • Free version available

  • User-friendly interface

  • Screen and audio capture/recording

  • Annotations

Cons:

  • Free version limits video recordings to 5 minutes

  • No free trial for the PRO version

Here’s how to record your screen with Screencastify: 

  1. From your Chrome browser, visit the Chrome web store and search for Screencastify.

  2. When you find it, click on Add to Chrome and confirm the addition. It will be added to the top right of the toolbar. 

  3. When you click on that, it'll take you to a sign-in page. Create an account and sign in. You'll then be asked to give the required permissions. 

  4. When you click the button in the toolbar, you can choose a recording method and start recording.

Download Screencastify

How to screen record on Windows 7

Step 1. Install the Movavi software

First, install and launch Movavi Screen Recorder on your PC.

Step 2. Adjust the settings for the session

Click the Cogwheel icon and set the parameters as necessary in the dialog box that appears. Сlick OK.

Step 3. Start recording

Click Screen recording and select the part of the screen you want to capture. Make sure the settings are as you want them for the Webcam, Microphone, and System audio (they can be activated or deactivated depending on your needs).

Click REC to begin the process after a short countdown. You can use the Screenshot and Pause buttons during the recording. Click Stop to finish.

Step 4. Export the file

Click Export. In the dialog box that appears, name the file and choose the output format. Click Save.

How to choose a free screen recorder for a PC on Windows 7

This section summarizes the most important things to consider when choosing a Windows 7 video recorder.

  • Price: some screen recorders are free, and others offer both free and paid versions. If you want a free app, make sure it has the features you need. Does it restrict things like recording times and the number of allowed recordings? Consider another app or the PRO version if it falls short, especially if it offers a free trial period.

  • Graphical User Interface (GUI): no one ever complains that a screen recorder is too easy to use. Make sure the interface is intuitive, uncluttered, and has a gentle learning curve. At the same time, check that the GUI has everything you need.

  • Screen recording options: what do you need to capture? Some tools only record specific areas, while others capture the entire screen or both. Also, check that the app offers audio recording as well if that's important to you.

  • Editing tools: check that the program has editing tools if that matters to you. Some apps offer basic editing like join, trim, and crop. Others have built-in editors or no tools at all.

  • Save and share: can you save your files in the formats you need? If you plan to share your captures, make sure you can upload them directly to platforms like Google Drive, YouTube, etc.

Software

Pros

Download

Easy-to-use, integrates nicely with other Movavi video editing products

Fully web-based without requiring a download

Save files directly to Google Drive for convenient backup

View all programs

Useful tips for screen recording

Before you start a screen recording, make sure to do some preparations:

  • Whatever you want to record should be finalized, whether it’s a presentation or a program tutorial.
  • Write down key points you want to cover in your video.
  • Rehearse your video or presentation before the recording.
  • If you make a mistake that requires editing, pause for a moment before continuing. This will make it easier to find and cut the section out.

Summary

We hope you found this article helpful in your choice of a screen recorder. There are many things to keep in mind when picking screen-recording software, so make sure to pay attention to details and feel free to employ the advice from the above section.

Movavi Screen Recorder

The perfect way to record anything from your screen

Frequently asked questions

How do I record my screen on Windows 7 for free?

You can record your PC or laptop screen with Movavi Screen Recorder. This software allows for free screen video capture on Windows 7.

  1. Download and install the app.
    Download Movavi Screen Recorder

  2. Launch the recorder and click Screen recording on the sidebar. 

  3. Adjust the capture frame and activate webcam and sound recording if needed.

  4. Record your screen.

  5. Trim the recording and save the result.

Which is the best screen recorder for Windows 7?

Movavi Screen Recorder is one of the best screen capturing programs for Windows 7. Here are some other options for you to check out:

  • OBS Studio – best for screencasts and broadcasting game streams to platforms like YouTube and Twitch.
  • Screencastify – best for quickly creating troubleshooting and how-to videos, recording product demos, etc.
  • Screencapture.com – best for teachers, students studying at home, presentations, creating tutorials.

Does Windows 7 have a screen recorder? 

There’s no built-in screen recorder on Windows 7. Luckily, there are a lot of screen recorder compatible with Windows 7. You can try a desktop app, like Movavi Screen Recorder. 

What is the best sound recorder for Windows 7?

Here are some of the best audio recorders you can use on Windows 7:

  • Movavi Screen Recorder – best for novice and expert users, advanced editing, record live streams.
  • Audacity – best for audio recording and editing.
  • Ardour – best for recording audio and making music.
  • Screencapture.com – best for teachers, students studying at home, presentations, creating tutorials.
  • Apowersoft Online Audio Recorder – best for recording the screen and audio at the same time, including narration and voiceover.

How do I record gameplay on Windows 7? 

To record gameplay, try Gecata by Movavi:

  1. Download and launch the app.
    Download Gecata by Movavi

  2. Make sure that the capture mode is set to Game. If you want to record webcam and microphone, turn on the corresponding options. 

  3. Start recording and then hit Stop to finish.

Does Windows 7 have a screen capture?

You can take screenshots on Windows 7 by using key bindings. Press PrintScreen (or PrtScr) to capture your entire screen. To capture only the active window, press Alt + PrintScreen.

How do I record my screen with sound on Windows 7?

  1. Download and install Movavi Screen Recorder.
  2. Launch the program, click Screen recording and select the part of the screen you want to capture.
  3. Make sure the System audio icon is active.
  4. Click REC to start recording. When you are finished, click Stop.
  5. In the window that opens, trim the recording if needed. Then Hit the Export button.
  6. In the dialog box that appears, name the file and choose the output format. Click Save.

How do I record my screen with OBS on Windows 7?

  1. Create a scene by clicking the + icon in the section of the OBS window marked Scenes
  2. Give the scene a name and then move over to the section marked Sources. Click the + icon there to add a source. 
  3. Select Display Capture to capture your screen. Now, you can press the Alt key and drag the mouse to crop the capture area. 
  4. Once everything is ready, press the Start Recording button.

Does Windows 7 support screen recording?

There’s no built-in recorder on Windows 7. However, you can use any compatible program such as Movavi Screen Recorder. This video capture software has advanced features packed in a sleek and simple interface.

What is the screen recorder key in Windows 7?

There’s no key binding for screen recording on Windows 7, because this OS doesn’t have a built-in screen recorder. However, you can use any third-party screen recording software, desktop or online. We recommend using Movavi Screen Recorder. This feature-rich app has both recording and screenshotting functionality wrapped in a user-friendly interface.

Have questions?

Have questions?

If you can’t find the answer to your question, please feel free to contact our Support Team.

Join for how-to guides, speсial offers, and app tips!