How to Screen Record on a Mac [5 Best Ways]

Try Movavi Screen Recorder!

  • Capture internal audio and microphone on your Mac.

  • Grab your screen and webcam in high quality.

  • Edit and share your recordings.

Edited by Ben Jacklin
16 056

There are many situations in which you might like to record the screen on your Mac. To do this, you'll need to learn how to screen record on a Mac. This guide covers desktop screen recorders for Mac and built-in recording tools.

Editor’s choice: Movavi Screen Recorder

Allows users to capture high-quality videos together with system sound and microphone.

Recording without extra apps: hotkeys

For easy capture: QuickTime

There are many ways to record a video on your Mac. Depending on your needs, you may choose the program with extra options such as editing recorded videos or a simple tool with only one purpose.

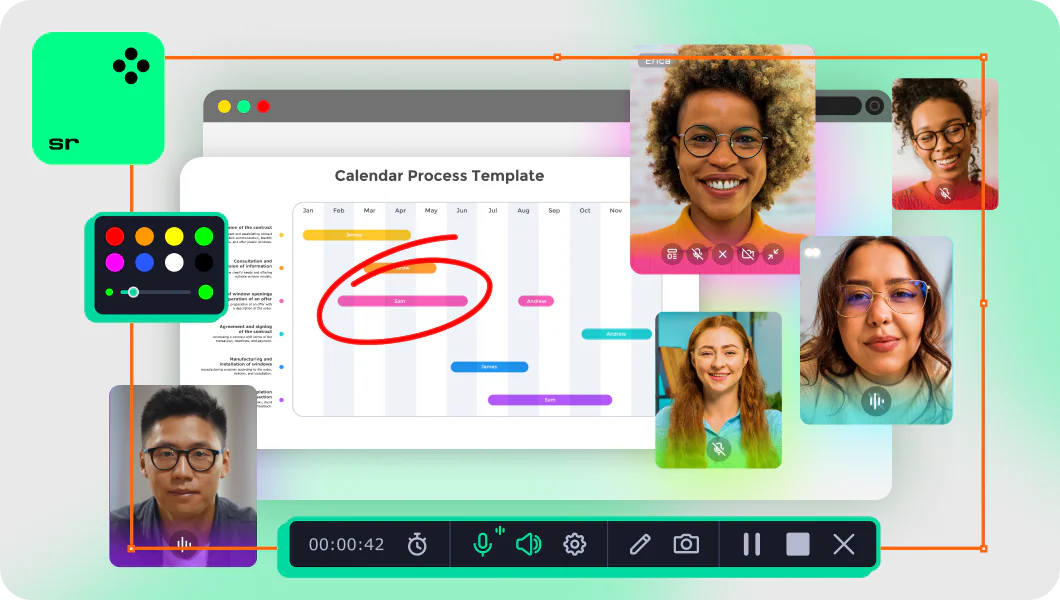
Our special pick from this article is Movavi Screen Recorder. Able to record both video and audio, including external audio via a microphone and system sounds directly through your Mac, this is one of the most reliable and versatile Mac screen recording programs you can use. It's ideal for capturing any screen activities, and it's very easy to use, even for beginners.

At Movavi, we’re committed to providing you with verified information only. Here’s what we do to ensure this:

  • When selecting products to include in our reviews, we research both demand and popularity.

  • All products mentioned in this article have been tested by Movavi Content Team.

  • When testing, we aim to highlight the best features of a product and what it’s best suited for.

  • We study user reviews from popular review platforms and make use of this information when writing our product reviews.

  • We collect feedback from our users and analyze their opinions of Movavi software as well as products from other companies.

How to make a screen recording on a Mac with Movavi Screen Recorder

  • Best for:

    Beginners and advanced users who want to record a screen on a Mac with system audio and microphone

G2 rating: 4.5 out of 5, 48 reviews

Movavi Screen Recorder is a reliable and effective app for people who want to know how to record your screen on a Mac or how to screen record on a MacBook. With this app, you can easily record streaming videos on your Mac, capture webinars and online calls, or create video tutorials. The program also offers advanced editing and converting tools you can use to trim files after recording.

Features:

  • Record webcasts with or without the audio stream
  • Overlay the webcam preview and change its size and shape
  • Grab system sound, mic, even speaker feeds – clean and noise-free
  • Show keystrokes and mouse movements, draw right on your screenshots and videos while recording live
  • Schedule to record at any time, then watch later
  • Save your recordings in every popular file format
  • Share links to your videos or upload them directly to the cloud and social media

Pros:

  • A handy tool to ramp up productivity with digital media capture

  • Easy to set up and grab from screen or webcam in HD and 4K

  • Ready to customize footage and create videos on the go

  • Taking and editing partial or scrolling screenshots is a snap

  • Runs smoothly on any Windows or Mac computer

Cons:

  • No limits to your creativity in the full version of the program

Step 1. Install the software

Download the program and follow the installation instructions.
Download Movavi Screen Recorder

Step 2. Set the recording area

After you launch the program, the sidebar will appear. Press the icon with the video camera. Use the cursor to position the capture frame to record a particular area of the screen.

Step 3. Record your screen

By clicking on the REC button, you can start to record the screen on a Mac. There are hotkeys to help you control the recording process: ⌥ ⌘ 1 to pause and resume and ⌥ ⌘ 2 to stop to record screen activity on a Mac. You can also change these hotkeys if you wish; to do this, go to the Settings menu.

Step 4. Edit the recording (optional)

Last but not least is the process of editing and converting the result. Click the Scissors icon and use the white markers to select an unnecessary part of the capture and cut it by clicking the Trash Can icon.

Step 5. Save the final video

Now hit the Export button to save the result. Don’t forget to name the file and choose the folder, so you don’t lose the recording. Choose the format for the recording – popular video formats like MP4 and MOV are available. If you want to record a GIF on your Mac, simply choose the GIF format. Complete the process by hitting the Save button.

Recording without third party apps

Hotkeys

Editor’s rating

3.8
/5
Bestseller

A set of programs for screen recording, video editing, and conversion

Movavi Screen Recorder

Editor’s rating

4.6
/5

A simple preinstalled software

QuickTime

Editor’s rating

4
/5

How to record your screen on a Mac with hotkeys

  • Best for:

    Users who want to screen record without downloading any extra programs

Can you screen record on a Mac without downloading anything? You definitely can! It is possible to use Mac's own built-in recorder and hotkeys to start recording on the fly whenever you want to, without any extra downloads or installations needed.

Features:

  • Multiple screen recording options (full screen, partial screen, specific window)
  • System audio recording capability
  • Microphone audio capture capability

Pros:

  • A quick and efficient method

  • No need for extra downloads

  • Completely free

Cons:

  • Doesn't allow you to easily capture system audio

How to record the whole screen

Step 1. Launch the recording app

Press the Command + Shift + 5 keys at the same time on your Mac's keyboard.

Step 2. Start recording

Select the Record Entire Screen option in the pop-up toolbar at the bottom of the screen.

Press the Record button to start recording your entire screen.

Step 3. Stop recording

When you're ready to end the recording, click on the Stop icon (a square inside a circle) at the top of the screen. You may also press the Command + Control + Esc keys to end the recording.

How to record a part of the screen

Step 1. Launch the recording app

Press the Command + Shift + 5 keys on the keyboard to bring up the recording toolbar.

Step 2. Start recording

Press the Record Selected Portion button to record a specific portion of the screen, or click on the icon that is further to the right, which shows a dotted line and allows you to click and drag out to cover an area of the screen you want to record.

Press the Record button to begin the recording process.

Step 3. Stop recording

When you've finished recording, click on the Stop icon at the top of the screen or use the Command + Control + Esc shortcut.

How to record a screen with a microphone audio

Step 1. Launch the recording app

Press the Command + Shift + 5 keys to bring up the recording menu.

Step 2. Start recording

Choose whether you want to record the entire screen or a section of the screen, following the instructions listed in the previous sections.

Click on the Options button to access extra settings. You can then select which audio source you want to record audio from, such as an external microphone or the device's built-in microphone.

Press the Record button to start recording the screen on a Mac.

Step 3. Stop recording

Press the Stop icon or press Command + Control + Esc together to stop screen recording.

How to screen record on a MacBook with QuickTime

  • Best for:

    Users who want to easily capture video from their Mac screens

Another option for how to screen record on a Mac is to use the built-in QuickTime Player application. This app is usually used for playing media files, but it can also be used to make them and edit them, too, and it works for capturing video from your Macbook Air, Macbook Pro, or other Mac OS X device. If you also want to use QuickTime as audio recording software for your Mac, pay attention that the program doesn’t capture microphone audio. 

Get QuickTime

Features:

  • Video playback
  • Synchronized graphics and sound
  • Microphone audio capture
  • System audio capture

Pros:

  • No need to download or install anything extra

  • Free and easy to use

  • Can also play and edit your recordings

Cons:

  • Can only capture external audio

Step 1. Start the recording app

Open the QuickTime Player application on your Mac device.

Step 2. Set the recording

Press File, then click on New Screen Recording. This will open the Screenshot and Recording tools.

You can click on the various icons to capture the full screen or part of the screen.

You can also click on the Options menu to adjust options, like setting up a timer or choosing an audio device to record external audio with your recording.

When you're ready to start capturing, press the Record button.

Step 3. Stop the recording

When you're finished recording, press the Stop icon at the top of the screen, or use the Command + Control + Esc hotkeys shortcut to stop screen recording.

How to record a screen with OBS Studio

  • Best for:

    Users who are interested in content creation or streaming

TechRadar rating: 4 out of 5

OBS Studio is a free and open-source app that you can use to screen record Macbook, iMac, or any other Mac device. This app is used by a lot of YouTubers, streamers, and content creators, thanks to its versatility. It offers a range of features that advanced users can take advantage of while filming to make unique, custom videos and presentations. OBS lets you capture screen and record sound on your Mac, including system sounds and microphone audio.

Features:

  • Real-time video capture and editing features
  • Audio mixer tool
  • Unlimited scenes and video tracks
  • Customizable configurations for audio and video editing
  • Modular dock user interface

Pros:

  • Free and open-source

  • Lots of features and functions for users to experiment with

  • Trusted by many content creators and professional streamers

Cons:

  • The interface can be quite confusing and overwhelming for beginners

Step 1. Get the application

So, how do you use OBS Studio to film your screen on a Mac? First, download the application to your computer from the official OBS site.

Download OBS Studio

Install the application, following the instructions to complete the process. Once the program has been installed, you can open it up.

Step 2. Adjust the settings

Note the Sources box in the bottom-left section of the screen. You should click on the + icon at the bottom of this box and then click Display Capture. A menu will appear with the list of monitors you have. You can then click on the main display you want to record from.

You can add additional recording sources to the Sources box, if desired. For example, you may add a webcam source if you want to record a video of yourself, and you can click on Audio Sources to add a range of audio sources, like external microphones or system audio, to record sound.

Once your sources have been added, you can use the Settings menu to adjust settings and choose where your recordings are to be saved to.

Step 3. Do the recording

Finally, press the Start Recording button in the bottom right to begin the recording process with OBS Studio.

You can pause the recording at any time using the Pause button in the bottom left and then press Stop Recording when you've finished. The recording will be automatically saved to your system.

Recording without third party apps

Hotkeys

Editor’s rating

3.8
/5
Bestseller

A set of programs for screen recording, video editing, and conversion

Movavi Screen Recorder

Editor’s rating

4.6
/5

A simple preinstalled software

QuickTime

Editor’s rating

4
/5

How to record a screen with ScreenFlow

  • Best for:

    Users who want an all-in-one video creation, editing, and sharing tool

TechRadar rating: 4.5 out of 5

If you're looking for a professional-grade app for screen recording, video editing, and video creation, ScreenFlow might be the best way for you to screencast on a Mac. This high-end app is made for experienced users and offers a wide range of features, as well as iOS recording, a stock media library, professional animations, and more.

Features:

  • Simultaneous screen and webcam recording
  • System and microphone audio capture
  • Library of customizable titles
  • iOS screen recording 
  • Video-editing tools

Pros:

  • Lots of advanced features

  • Can be used to record on iOS devices, too

  • Produces high-quality recordings with both video and audio

Cons:

  • One of the most expensive screen recording apps available

Step 1. Download and install the program

The first step of using ScreenFlow to record your Mac's screen is to download and install the ScreenFlow app from the official site.

Download ScreenFlow

Step 2. Tweak the settings

Once the program has been installed, open ScreenFlow. A window will appear that lets you select the video and audio you wish to record. Configure the parameters accordingly.

Step 3. Record the screen

Press the Record button. A timer will count down and the recording will start.

When you want to stop recording, click on the ScreenFlow icon in the top right section of the screen and press Stop Recording.

The full ScreenFlow menu will then open up with your recording file ready to be edited and saved.

How to stop recording with hotkeys and QuickTime

If you're recording your screen using either hotkeys or the QuickTime Player, the method to stop your recording is always the same. All you need to do is press the Stop icon, which looks like a square inside a circle and appears at the top of your screen. As soon as you click on this icon, the recording will end and you can then save it to your device for editing, sharing, and playing.

How to edit recorded videos in QuickTime Player

Once you've recorded videos of your Mac's screen, you may want to edit them. You can do this with the help of QuickTime Player. Here's how to do it.

Step 1. Add the file to the program

To get started, open the QuickTime Player application.

Press File and open the video that you want to edit.

Step 2. Do the necessary edits

Click on the Edit button to access the editing menu. From here, you can make use of various editing features and functions to make adjustments to your clip.

If you want to rotate or flip your file, click the Rotate/Flip buttons in the editing menu. You can turn the video left or right, or flip it horizontally or vertically.

If you want to trim your file, click the Trim button and adjust the beginning and end lines to isolate the part of the recording you wish to save. Then press Trim to confirm.

If you want to split a video into multiple clips, move the red line to the section where you want to split and press the Split Clip button. Your clip will split into two.

Step 3. Export the result

When you've finished editing, press the Done button and then go to File > Save to save your new video.

Recording without third party apps

Hotkeys

Editor’s rating

3.8
/5
Bestseller

A set of programs for screen recording, video editing, and conversion

Movavi Screen Recorder

Editor’s rating

4.6
/5

A simple preinstalled software

QuickTime

Editor’s rating

4
/5

Tips on recording a screen

Before you start recording your screen to make videos, it's a good idea to do some preparation. Here are some tips to keep in mind:

  • Make sure that whatever you want to record is finalized and ready to start, such as a presentation you want to show or a program you're making a tutorial for.

  • Write down some notes to remind you of important points you want to cover in your video.

  • Rehearse your video or presentation several times before starting the recording.

  • Try to ensure that you record in a quiet space when using a microphone, as you will want to try and minimize any background audio.

  • If you make a mistake that needs to be edited out, pause for a moment before continuing. This will make it easier to find and edit the section out.

How to choose a screen recorder

Hopefully, this guide has helped you find out more about how to screen record on a Mac, as well as highlighting some of the best methods to capture both video and audio from your device. If you're not sure which tool to use, here are some factors to think about:

  • Ease of use: Try to find a method or app for screen capture that is easy to use and matches with your own abilities and experience levels.

  • Features: Make sure you use an app or method that has the features you need, which may include the option to record just part of the screen or the ability to record internal audio on a Mac.

  • User reviews: Read through user reviews of different pieces of software to find out what people think about them and which ones are worth trying out.

  • Support: It's also wise to find an app that has strong customer support options, like detailed guides and friendly live chat help systems, in case you have any problems.

Summary

Our guide covers various ways of screen recording on a Mac, whether you want to record from just a computer screen or incorporate games and webcam footage. Among the options listed above, you can surely find a tool that will best suit your macOS screen recording needs.

Movavi Screen Recorder

The perfect way to record anything from your screen

Disclaimer: Please be aware that Movavi Screen Recorder does not allow capture of copy-protected video and audio streams.

Frequently asked questions

How do I record my screen on a Mac?

You can use Movavi Screen Recorder to record screen on your Mac.

  1. Download and install Movavi Screen Recorder.
    Download Movavi Screen Recorder
  2. Open the program and click Screen recording. Choose your capture area.
  3. Press the Speaker button for system audio and/or the Microphone button for microphone/external audio.
  4. Press the red Record button to start and press Stop when you're finished.

How do I record my Mac screen without QuickTime?

There are various ways in which you can capture your Mac screen without having to use QuickTime. You can download and use a recording app such as Movavi Screen Recorder, ScreenFlow, or OBS Studio. Another option is to record using hotkeys.

How do you screen record on a Mac?

You can use your Mac's own hotkey combinations to start screen recording using a built-in tool:

  1. Press the Command, Shift, and 5 keys at the same time.

  2. Choose to record either the whole screen or a section of it.

  3. Use the Options menu to configure your recording and choose to record sound, if needed.

  4. Press the Record button to start and press the square in circle icon at the top of the screen to finish.

How do I record my screen and audio on a Mac?

You can record your Mac’s screen (including audio) from your computer and/or a microphone in just a few steps:

  1. Download and install Movavi Screen Recorder for Mac.
  2. Launch the app and tap the Screen recording button in the toolbar.
  3. Drag your cursor across the area of your screen that you want to record.
  4. In Movavi’s toolbar, select your preferred audio settings to record system and/or microphone sound.
  5. Click the REC button to start recording. You can also pause and restart if needed.
  6. When you’re finished, click the Stop button.
  7. Edit your screen recording in Movavi Screen Recorder and save it or share it to your preferred video platform.

For more detailed instructions, check out this article:

5 ways to screen-record on a Mac

Can QuickTime record screen and audio?

Yes, QuickTime can record your screen with microphone audio if you have your microphone set up. To record your computer’s audio, you’ll also need to ensure that you’ve selected the option to record system audio, as well. To record audio in your screen recording in QuickTime, go to the File menu and choose your microphone from the dropdown menu.

How do I record with QuickTime Player?

To record your Mac’s screen with QuickTime Player, follow these steps:

  1. Open QuickTime Player.
  2. In the File menu, select New Screen Recording.
  3. Click on the icon to record part or all of your screen.
  4. Click Record to start recording.
  5. When you’re done, click Stop and your screen recording will save to your computer.

Do Macs allow screen recording?

Yes, Mac screen recording is allowed. You can use built-in hotkey features to take a simple screen recording, or you can download an app like Movavi Screen Recorder to take more advanced recordings and create fully edited, polished videos.

How do you record on a Mac without an app?

You can record your Mac’s screen without downloading any third-party apps. To record your screen, follow these steps:

  1. On your keyboard, press Cmd + Shift + 5 together.
  2. Choose the option that best fits your needs (Record Entire Screen or Record Selected Portion).
  3. Click the Record button to begin recording your screen.
  4. When you’re done, click Stop.

Why is there no sound when I screen record on a Mac?

If you’re using hotkeys or another solution to record your screen on a Mac, you may not have set up the recording to capture system audio. You can check the settings or options in your screen recording solution to try to fix this problem. You can also avoid “no sound” issues by using a more robust application like Movavi Screen Recorder.

Have questions?

Have questions?

If you can’t find the answer to your question, please feel free to contact our Support Team.

Join for how-to guides, speсial offers, and app tips!